Have you ever started a DIY project only to realize that it was a little bit above your skill level? It can be frustrating to invest time and money into a project that is more of a hassle than it’s worth in the end.
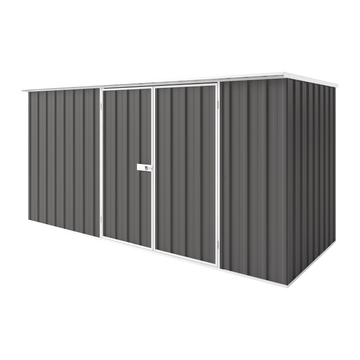
In this article, we’re going to share our favorite easy DIY projects that you can do right in your backyard shed. Whether you’ve only got an afternoon to work on a project, or your just looking for something to tinker with on the weekends, you’ll find the perfect DIY project on this list!
Backyard Improvement Projects
DIY Hammock
If you’ve always wanted a hammock but have been disappointed by the high prices, why not make one yourself? Here are the materials you’ll need for this project:
- Sewing machine
- Oversized cotton beach towel (definitely needs to be a sturdy cotton towel or something similar - traditional beach towels may not be strong enough)
- 3cm leather or canvas strapping
- Pins
- Scissors
- Canvas or heavyweight cotton muslin - it needs to be the length of your beach towel by 10cm
- You’ll need 18 pieces of 2.5m of rope (about 50m in total)
You can find the full instructions for this project, here.
Outdoor Rope Seats
These pouf-style rope seats are sturdy enough to leave in the backyard all the time, and they’re great to put around your fire pit. Here are the materials you need to make your own outdoor rope seats:
- 2 to 4 old rubber tires (or however many chairs you want to make)
- Sisal rope and nylon rope
- Hot glue gun and a few extra glue gun sticks
- Scissors or rope cutter
- Sealer (optional)
Making these rope ottomans is simple. You’re basically going to create a strong base with the nylon rope and then wrap the whole thing in the sisal rope. The hot glue gun should keep everything securely in place, but a sealant over the entire thing will make these ottomans really sturdy.
You can find the full instructions for an outdoor rope ottoman, here.
DIY Market Lights
Alright, stringing up market lights (sometimes called outdoor globe lights) is a gorgeous DIY backyard improvement project. But you can take it to the next level by creating your own string light orbs that can hang from trees or be strung throughout your backyard.
You’ll make these orbs with twine or with twigs - willow twigs and grapevines work well because they’re pretty flexible while also being sturdy enough to hold their shape.
If you’re using twigs, the basic idea will be to wrap your natural materials around a beach ball or other large orb and then secure the pieces with brown or black wire. Thicker twigs like willow twigs can also be wrapped without wire.
If you’re using twine, you’ll be wrapping it around a balloon or a beach ball that you don’t mind popping when you’re done using it. You’ll paint the twine onto the orb with wood glue and then when it dries, you’ll pop the balloon and be left with the twin orb. This is a gorgeous alternative, but it might not be quite as sturdy as your twig orb - that’s fine if they’ll be hanging in a protected area of your backyard.
When you’re ready to put string lights in your natural orbs, you can simply intertwine them with or bundle them up inside the orb. It’s best to use battery-operated string lights so that you can hang them up in any part of the backyard you choose.
Here are a couple of resources to learn more about making twine orbs, and twig orbs.
Chicken Wire Hanging Plant Display
If you have an unused wall in your backyard, you can put it to good use by creating a hanging plant display. All you’ll need is enough chicken wire or similar strong wire to cover the area you want for your display, fence staples and a fence staple gun, and steel wire.
You can attach your hanging display directly to your fence, the side of your house, or the side of your backyard shed, or you can create a structure, with instructions here.
This project is wonderful for displaying small plants like herbs and succulents. They’ll get plenty of sunlight and you’ll love the way this easy project transforms the look of your backyard.
Home Improvement Projects
DIY Plush Tufted Headboard
This is a project that can be done in your backyard shed in just a couple of hours. The materials you will need include:
- Wood board the size of your bed
- Foam (or a foam mattress topper)
- Fabric of your choice
- Buttons, thread and upholstery needle
- Quilt batting
If the tufting part of this is giving you pause, you can also make a soft, comfortable headboard without it! You can find the instructions on this DIY project, here.
Create a chalkboard calendar
Now that chalkboard paint is so widely available, turning ordinary items into chalkboards has become a super easy DIY project. Calendars are great items to have as chalkboards so that they can be reused over and over. Plus, they look absolutely great on the wall of your house.
This DIY project can be done in your backyard shed in no time. All you need are the following materials:
- A large hardwood board of the size of your choice (the bigger the better, so that you can more easily write in your activities)
- Chalk paint
- A white paint pen or white tape (these are going to be for the lines of your calendar)
- Ruler or level
If you’re looking for a beginner’s DIY project, this is the one for you. All you have to do is paint the hardwood board with the chalk paint, let it dry, and then create your blank calendar. Make sure that you make your grid 7X5 so that you can fit the entire month. Then, you and your family can get as creative as you’d like when you fill in your DIY chalkboard calendar.
Get inspired, here.
Paint your doors
An easy way for you to spruce up your home is to paint your doors, both the exterior and interior ones. You’ll want to do this in the backyard, where the fumes won’t bother you and you won’t have to worry about paint drops landing on the floor. Still, if you’re going to do this in your backyard shed, make sure it’s well ventilated and you’ve put down a protective tarp or plastic covering.
In order to paint your doors, you’re going to need:
- Sand paper
- Drop cloths
- Paint of your choice
- Roller brush
- Paint brush
- Paint tray
When you paint your doors, make sure that you remove all of the hardware - hinges and door knobs. If your door has a window, protect it with painter’s tape.
You can get a full tutorial on how to paint doors, here.
DIY Blanket Ladder
This is a versatile DIY project that you can use to hang blankets, plants, magazines, or really anything else you can think of. You can go for a vintage ladder look or create something more modern, depending on your home decor.
To make this project, you’re going to need:
- 90mm x 35mm x 3m oak for the sides of your ladder
- 2400mm x 35mm oak dowel for the rungs
- Bullet head nails
- Wood glue
- Paint or stain (depending on whether you want to go for a vintage or modern look)
- Rags
- Sand paper
This is a great project to do in a weekend in your backyard shed. You’ll need the tools, like a circular saw and drill, so that you can cut down the pieces and create the holes for the rungs of your ladder. Once you’ve got the ladder put together, the fun part of this project is painting and giving the ladder an old, vintage look if that’s what you’re going for.
You can get a full tutorial for a vintage blanket ladder, here, or a modern blanket ladder, here.
Gifts and Crafts
If you’re looking for easy DIY projects that you can use as gifts or pieces of artwork to display in your home, there are plenty to choose from. These can all be completed right in your backyard shed, and you’ll wow your friends and family with these simple DIY projects.
Old Book Coasters
If you’ve got books lying around that are just waiting to be donated or thrown out, why not turn them into coasters? You can use the pages inside, a paperback cover, or a hardback cover to make your coasters.
All you’ll need is some Mod Podge or similar liquid glue, scissors (or if you’re using a hardcover book, you might need a more heavy duty box cutter), a liquid sealant and square bases for your coasters. You can use corkboard, wood tiles, or anything else that will give you the size and shape you want!
When you’re ready, cut the paper to fit the top of the coaster, layer on some glue on your base, and lay the book page gently on the coaster base. It’s helpful to get the book pages a bit wet before you do this step to make sure they don’t wrinkle.
Let the page dry onto the coaster base and then cover with your sealant. That’s it! This easy DIY project makes a great gift for any occasion, and you can easily complete it in an afternoon.
For some inspiration and advice on making vintage book coasters, click here.
Fun and Easy Macrame Crafts - Hanging Bottle Planters
If you like to grow plant clippings in water, but all of your surfaces are covered with those bottles of sprouting plants, why not try making a macrame holder that you can hang from the ceiling? Unlike some of the more complicated macrame projects, these holders are simple and can be completed in no time!
Here’s what you’ll need:
- Small bottles of various sizes (plus your plant clippings!)
- Macrame cord - you’ll want 4 to 6 pieces of cord that are about 2 and a half times as long as you would like the finished project to be.
- Beads if you would like to add them
- If you’re going to hang these plant holders up at home, you’ll also want a wall hook or ceiling hook
This is a simple macrame project that anyone can do - even if they’ve never attempted macrame! Of course, it’s helpful to have a guide, so you can find the full instructions, here.
Concrete Flower Vases
With just a few ingredients and a little bit of patience, you can create gorgeous, modern flower vases of different sizes and styles. Here are the materials you would need to make this project in your backyard shed:
- Plastic bottles of the size and shape you want for your vases (this will be your mould.) Make sure they have lids so that you can affix the mould for the interior of your vase
- Concrete mix - sometimes you can find this at your local craft store, or you can talk to your local Bunnings or other home improvement store
- Straws, test tubes, or whatever else that will work for the inside of your vase
- A drill (to affix the straw or test tube to the cap)
- Pliers
- Box cutters
The basic idea for this project will be to fill the mould with your concrete mix and fix your inner mould so that it stays in place when you put the cap on. Then, when the concrete is dry, you can cut off the plastic bottle with the box cutters and remove the inner mould.
You can use different colour concrete mixes or dip the vases in metallic paint to give them a more modern look. Either way, you’ll have a great, fully functional vase that will look great in your home!
There are plenty of easy DIY projects to try!
If you’ve been wanting to start up some easy crafts or activities that you can do right in your backyard shed, we hope this list has inspired you to take on some fun and easy DIY projects!


