Here are our top 6 Easter Weekend DIYs to make this Easter!
Easter’s just around the corner and we’ve collected some very creative and fun DIY projects for you to do. From Easter baskets to burlap rabbits, there’s something here for everyone.
DIY Floral Easter Basket

Image Source: papernstitchblog.com
Put all your eggs in one basket in this beautiful floral Easter basket.
To get started on this project, you’ll need:
- Your favourite fresh flowers
- Lamb’s Ear leaves
- Old or new Easter basket
- Hot glue and glue sticks
- Scissors
Before starting this project, you’ll want your flowers to be very hydrated so that the blooms last longer. Cut at least 1/3 off each steam then place them in 3-4/3 of room-temperature water. Leave your flowers there for at least 3-4 hours before using them. You can also let them hydrate for 24 hours so that the blooms have more time to open.
To start, cut the stems from the Lamb’s Ear leaves then hot glue them to the sides of your Easter basket. You can also use any other type of leaf that you prefer. The leaves will be the base of your flowers.
Once your base is set, cut the stems from the flowers then glue them on the leaves making sure you fill in any gaps.
Add your Easter eggs and you’re all set!
DIY Easter Egg Balloon

Image Source: balloontime.com
Make balloons even more fun by turning them into Easter egg balloons! Turn them upside down and you’ll notice that they have a very similar shape to eggs. With a little paint, you’ll have yourself some enjoyable DIY Easter egg balloons that the kids will love.
Here are the supplies that you’ll need:
- Latex balloons
- Acrylic or craft paint
- Paintbrush
- Strings, ribbons or twine
- Clear shipping tape
- Helium tank (optional)
Start by inflating your balloons and tie a temporary loose knot to the tail so they don’t slip away. Turn your balloon upside down then start painting your favourite Easter egg designs. Leave it to dry, then carefully untie the string from the tail. Use the clear shipping tape to fix the string to the top of the balloon.
That’s it! Enjoy your DIY Easter Egg balloon!
DIY Burlap Rabbit Table Runner

Image Source: kellyelko.com
Celebrate Easter weekend by creating this adorable DIY Burlap Rabbit Table Runner.
Here’s what you’ll need:
- Burlap ribbon
- A rabbit silhouette
- Scissors
- Stencil film
- X-Acto craft knife
- Newspapers / paper bags
- Brown craft paint (for chocolate-coloured rabbits)
- White pom pom tails
Print out your rabbit silhouette making sure that you make it as big as could fit on an 8 ½” x 11” sheet. Cut out the silhouette using your scissors. Next, lay it onto the stencil film then cut out with your X-Acto craft knife.
Put your newspapers or paper bags under your burlap ribbon then pounce on brown craft paint or any other colour that you like. Let the paint dry, then glue on the pom pom tails.
After that, you’re done! Enjoy the company of Peter Cottontail and his family!
DIY Easter Egg Candle Holders

Image Source: twosisterscrafting.com
Create these attractive Easter egg candle holders and add a touch of glam to your mantle.
The materials used for this project can be found at any local craft store.
To get started on creating your own Easter egg candle holders, here’s what you’ll need:
- Plastic Easter eggs
- Crafting paint brush
- Seed beads
- Mod Podge
- Power drill
- Wooden discs
- Wooden Dowels
- Wood glue
- Paint (any colour you wish)
- Candles
Start getting into the spirit of the season by making your own DIY Easter egg candle holders. Read Two Sisters Crafting’s tutorial here.
DIY Honeycomb Birds

Image Source: ohhappyday.comIf you’re looking for something a little out of the ordinary this Easter, these DIY honeycomb birds are great for you to do. They will go perfectly with your other Easter decorations, and you can also use them for other events such as a baby shower or birthdays.
While you’ll need to put in more work on this one as it involves a bit more craftiness, the results are worth it. Check out Oh Happy Day’s tutorial to get started.
DIY Burlap Bunny

Image Source: freetimefrolics.com
Here’s another fantastic idea that you can do with burlap. This DIY Burlap Bunny is inexpensive and simple to make as seen from freetimefolics.com’s picture tutorial below.

The materials for the DIY Burlap Bunny are:
- Two embroidery hoops, different sizes
- 1/3 metre burlap or more if your hoop is larger than 25 centimetres
- Fabric scraps
- Glue gun
- Electrical tape
- Cream or white yarn for pom pom
Using electrical tape, tape your hoops together as shown in the picture above. Tape them with the embroidery hoop’s tightening screws facing outwards so you can get burlap in.
Next, add the burlap starting from the bottom making sure the burlap is in tight. Trim the edges then hot glue the excess burlap to the hoop.
To create the ears, cut a 15-20 centimetre rectangle then cut down the centre about half way. Shape them to look like rabbit ears. Pull the bottom edges together then bunch them up. Once done, attach them to the top hoop.
Add some accessories such as a neck bow, a pom pom for the tail and a few rosettes for the ears. Have fun!
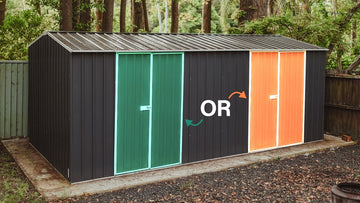
Tidy up with an EasyShed Garden Shed
Store your crafting tools in an EasyShed garden shed to keep your home clean and organised. Want your own dedicated workspace to focus on your DIY projects? Get an EasyShed workshop. From garden sheds and workshops to bike sheds and aviaries, we’re sure we’ll have a steel garden shed for everyone. Shop our sheds.


